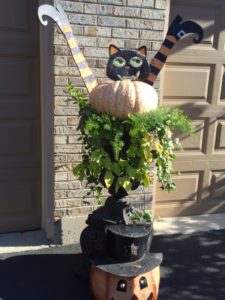
I wanted to do something a little different for my front stoop this Halloween. I’ve done more traditional fall pumpkin topiaries in past years but this year it’s witches. The directions for building a standard topiary is located below.
SUPPLIES: You’ll need 3 pumpkins in large, medium, & small sizes, wooden/bamboo kebab skewers, mallet & decorative accents, i.e. fall leaves, beads or garland.
Make sure the bottom pumpkin, or the largest one is large enough to fit into the bottom of your urn tightly, at least part of its weight should rest in the soil. Place this base pumpkin in the urn, you do not have to cut or gut this pumpkin and do no remove its stem or it will mold.
Select your middle pumpkin, make sure you have one with a nice stem, cut a circle in the BOTTOM of the pumpkin large enough that it can fit over the stem of the base pumpkin, remove all the seeds and guts from the pumpkin. Now place this second pumpkin on top of the base pumpkin and hammer the long kebab skewers into the second pumpkin until the skewer reaches the base pumpkin. Take your time and hammer the skewer all the way in, it will secure the second pumpkin to the base pumpkin. I usually use about six skewers around the perimeter.
Now repeat the same process to secure the top pumpkin as you did for the middle one, cutting out the BOTTOM and gutting it before securing this top pumpkin to the middle one with skewers. Now you can decorate for fall, Halloween or Thanksgiving. Use plastic leaves, cattails, branches, candy corn swags, fall colored garland or Halloween tinsel around the base and for the in between layers.
Instructions to complete the witch topiary.
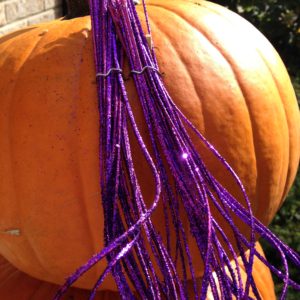
Once you have the topiary built you can decorate it. The first step was to add the witches hair I used the purple/glitter spray with spiral ends from the floral department. The spray comes about 3 feet long so I had to trim them down to about 10-12 inches.
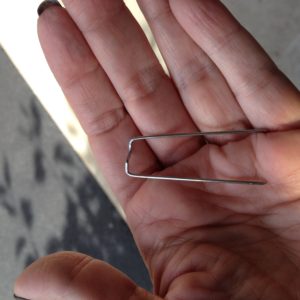
I used these greening pins to attach the hair to the pumpkin. You can find greening pins in the floral department of any craft store. It was easy to press the greening pins into the pumpkin most of the way and then you can use a hammer to secure them all the way into the pumpkin.
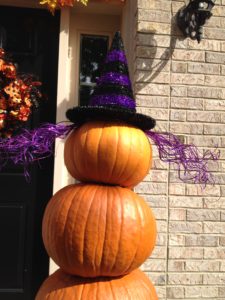
Next, I attached the Witch’s hat that I found at Michaels using the same pins. Then I added the spiders with webs for the witch’s eyes and another spider for the mouth.
I added this wire enforced garland in between the pumpkins layers to dress the pumpkin topiary. Adding a witches broom with a holiday message for the final touch.
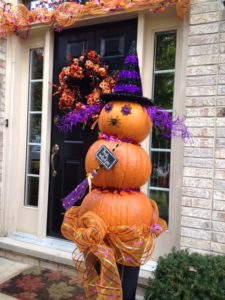
I used 21″ wide mesh ribbon to make the swag for the base of the pumpkins. I gathered the fabric in my hand, twisting the pipe cleaner around the gathered fabric to make the swags. I used the same greening pins to attach the swag to the base of the bottom pumpkin.
I hope you enjoyed this DIY project.
If you love Halloween take a trip to Salem and check out the Celtic witches who’ve hidden there for hundreds of years. Once upon a time witchcraft was safe, but now something dark and sinister from the OtherWorld is crossing over and it’s up to Locke, Keleigh, and the Seer to find a long lost artifact before they plunge our world into chaos. If you’d like to learn more about the real witches I created please check out the Deadly Fairy Tales Series.
Thanks for stopping by!
2 thoughts on “WELCOME WITCHES”
I am so loving these ideas , I really love that witch cat one LOL ..
@tisonlyme143
Thanks Dotty hope it adds to your holiday enjoyment!


I am so loving these ideas , I really love that witch cat one LOL ..
@tisonlyme143
Thanks Dotty hope it adds to your holiday enjoyment!
E